Why Cross Country Planning Trips Up Even Good Students
Cross country flight planning has grown more complex with the conflicting advice flying around. And here’s the thing — most mistakes student pilots make aren’t from missing information. You’ve sat through the ground school lectures. Your CFI walked you through a practice flight plan. You know the fuel burn formula. You can read a sectional chart.
Then you sit down to plan your first solo cross-country, and something shifts.
The mistakes live in the margins — between what you know and what you actually do under pressure. A student might nail the fuel math on a practice flight plan with zero stakes, then rush through the same calculation three days before a checkride and miss a wind adjustment entirely. Another understands Class D airspace in theory but misreads whether a route clips a shelf on the real sectional because they’re tired. It happens constantly.
I’ve watched sharp students stumble on oral exams not because they couldn’t fly cross-country, but because their planning was sloppy in ways nobody flagged during training. The DPE asks one probing question about fuel reserves, finds a gap, and suddenly the applicant realizes the mistake survived weeks of preparation undetected. That’s a rough moment to have that realization.
Today, I will share it all with you — the exact planning errors that trip up real students before and during their first solo cross-country. If you’re preparing for that milestone, or recovering from a checkride question that went sideways, you’re in the right place. So, without further ado, let’s dive in.
Fuel Planning Errors That Leave No Margin
Most fuel planning mistakes fall into two buckets: math errors and wind blindness.
The first is straightforward but surprisingly easy to botch. Students calculate point-to-point fuel burn using the aircraft’s performance data, add the VFR fuel reserve, and call it done. For day VFR, that reserve is 30 minutes at cruise power. Night VFR bumps it to 45 minutes. Simple rule. Except students often calculate the reserve using the wrong fuel burn rate — or they tack it onto only the final leg and forget it’s a total reserve from the point of no return.
Here’s how it breaks down in practice. Say you’re flying a Cessna 172S from home base to an airport 120 nautical miles away. The aircraft burns 8 gallons per hour in cruise at 2,300 RPM. No wind. Fuel needed: 120 NM ÷ 120 knots ground speed = 1 hour flight time × 8 gal/hr = 8 gallons. Add 30 minutes reserve at 8 gal/hr = 4 gallons. Total: 12 gallons. You have 40 gallons usable. You’re good.
Now add a 15-knot headwind.
Ground speed drops to 105 knots. Flight time stretches to 1 hour 9 minutes. Fuel burned on the leg: 9.2 gallons. The reserve — still calculated at the same burn rate — stays at 4 gallons. Total needed: 13.2 gallons. That’s an extra gallon and change compared to the no-wind calculation. Skip the wind adjustment and you’re planning a flight that burns through nearly all your usable fuel if the headwinds verify. That’s not a safety margin. That’s a hope.
Quick note before the rest of this. The second mistake is treating wind as optional in your fuel math. Every fuel calculation must account for forecast winds aloft — not just the ground speed written on your flight plan legs. Students pull winds from ForeFlight or a standard briefing, then calculate fuel burn using book numbers without adjusting ground speed. Wind adds time. Time burns fuel. No wind factor means no real reserve.
One more trap worth knowing: fuel planning at high-elevation airports. If your destination sits at 5,000 feet and the temperature is running 25 degrees above standard — common in summer across the Rockies — your aircraft’s performance numbers shift meaningfully. Density altitude matters. A student flying into a mountain airport on a warm afternoon and using sea-level fuel burn figures is quietly building in a deficit nobody will catch until it’s too late. Check the performance tables for actual altitude and temperature. Or, if you’re unsure, add 10 percent to your fuel burn estimate as a buffer.
The fix is mechanical and non-negotiable. Recalculate fuel for every segment using actual forecast winds, not calm-air numbers. Verify your reserve is calculated at the fuel burn rate you’ll actually see with headwind factored in. Check aircraft performance data at your destination’s field elevation. Then mentally recalculate with a 10-knot error margin in the winds aloft forecast — because forecasts are wrong sometimes, and 10 extra knots shifts your fuel picture by 5 to 10 percent. Avoid the path I took and skip that last step.
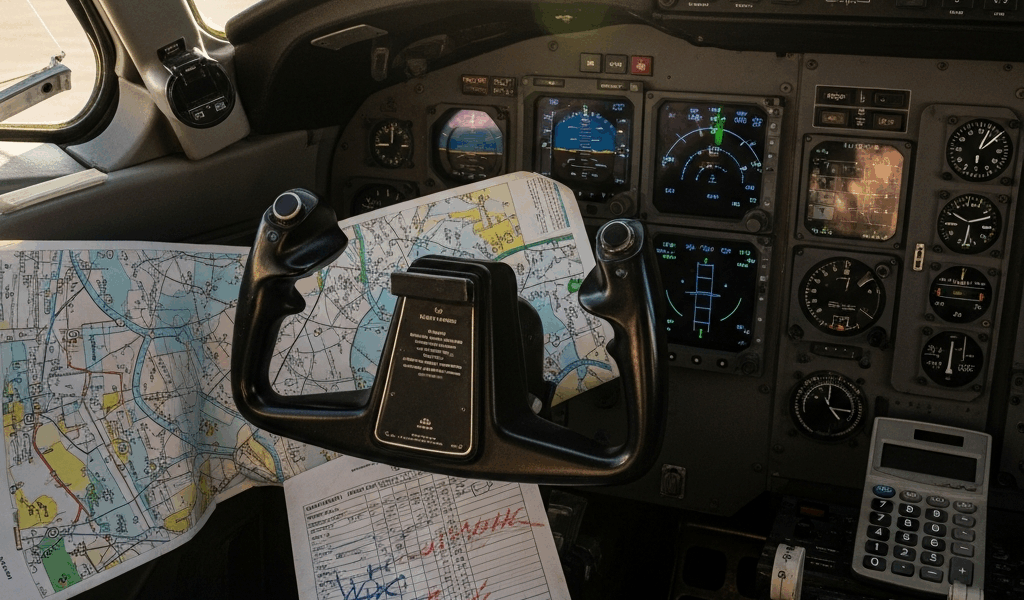
Misreading the Sectional Before You Ever Leave the Ground
Chart reading errors happen on paper, not in the air — which means they’re entirely your fault to catch before engine start.
The most common mistake is incomplete airspace verification along the route. A student draws a line from point A to point B, spots the Class C or D symbols near the endpoints, checks those, and moves on. Then forgets that airspace restrictions can clip a route in the middle. A Class D shelf might extend 10 nautical miles from an airport, and a direct route passes right through that shelf at 2,000 feet. ForeFlight will flag it in magenta. A physical sectional won’t visually announce it unless you carefully trace altitude limits and ring boundaries — which most students skip when they’re in a hurry.
Another routine error: assuming a TFR lookup is someone else’s job. It isn’t. Before every cross-country, you check the Federal NOTAM search or ForeFlight for Temporary Flight Restrictions. TFRs exist for wildfires, VIP movements, military operations, airshows — they change constantly. A student planning a flight three days out might check TFRs then, find nothing, and assume they’re clear for departure morning. A TFR issued the day before can now block the entire route. TFR checks happen the morning of the flight. Full stop.
Class D surface areas create a third trap. The purple dashed line on a sectional marks the Class D shelf. The solid purple line marks the surface area — typically a 4-nautical-mile radius. A student might see the shelf extends to 2,000 feet and think a route at 1,500 feet is clear, forgetting the surface area applies from the ground up and still requires clearance even below the shelf. Confuse that distinction — or mix up Class D with Class E — and you’ve got a route that violates airspace on paper before you ever start the engine.
The sectional also hides terrain if you don’t actively hunt for it. Brown shading shows elevation. Magenta triangles and numbers mark obstacles. A student flying from a coastal area inland might not notice rising terrain until the chart gets visually busy, then assume 3,000 feet is plenty — only to realize the terrain climbs to 4,500 feet ten miles ahead. That’s a bad discovery to make in the air.
Prevention is tedious. Do it anyway. Print or display your sectional. Use a highlighter — or the line tool in ForeFlight — to mark your route in one color. Use a second color to mark every airspace restriction that touches your route: Class D rings, MOAs, warning areas, anything requiring action. Trace the route systematically from start to finish at your planned altitude. Check terrain elevation along the entire route and verify your altitude stays at least 1,000 feet above minimum — 2,000 feet if the terrain is mountainous. Then perform a TFR check the morning of the flight. Only then is your route actually safe to file.
Weather Decisions That Seem Fine Until They Aren’t
Weather planning mistakes almost always come down to timing and personal minimums — and how students handle both under pressure.
The timing error is simple. A student checks weather the night before, sees a forecast that looks flyable, and mentally commits to the flight. Morning arrives. Scattered clouds at 3,500 feet are now broken at 2,500. Wind has shifted 30 degrees and strengthened. The student either hasn’t pulled updated forecasts, or they have — but they’ve psychologically committed and start talking themselves into going anyway. I’ve seen this cycle play out more times than I can count.
Weather forecasts are updated multiple times daily. A night-before briefing is a planning tool, not a go/no-go decision. The real briefing happens two to three hours before engine start — current observations, most recent forecast updates, fresh PIREP data. If weather has degraded below your personal minimums by then, the decision is already made. No go. That’s it.
The second error is underestimating scattered cloud layers that build through the day. A forecast of scattered clouds at 4,000 feet in the morning sounds fine for a 3,500-foot cruise altitude. By midday, heating and convection push that layer up, then break it wider, then drop it to 3,000 feet. The student ends up flying in marginal VFR — or worse, actual IMC without an instrument rating. Thermal activity peaks midday on warm days. Plan to fly early morning, or build in realistic assumptions about how layers evolve as temperatures climb.
But what is a personal minimums checklist? In essence, it’s a predetermined set of weather conditions you’ve decided are acceptable before emotion enters the picture. But it’s much more than that — it’s the tool that removes decision fatigue on flight day. Before departure, you should know your minimum ceiling, minimum visibility, maximum wind, maximum gust spread, and icing conditions. For a student pilot on a first solo cross-country, conservative numbers are the right call. Legal VFR minimums are 1,000 feet ceiling and 3 statute miles visibility. Your personal minimums should be 2,500 feet ceiling, 5 miles visibility, no gusts exceeding 10 knots. Write those numbers down. On flight day, compare actual and forecast conditions to those numbers objectively. Feelings don’t override the checklist.
How to Catch These Mistakes Before Your Checkride
Before your next cross-country planning session, run through four self-audit questions.
- Did you calculate fuel burn using actual forecast winds aloft — not calm-air numbers — and verify at least 30 minutes of usable reserve remaining after reaching your destination?
- Did you trace your planned route on a sectional and confirm it’s clear of Class C, Class D, and special use airspace at your planned altitude? Did you check TFRs the morning of the flight — not three days prior?
- Did you pull current weather and NOTAMs within two to three hours of planned departure, and do current conditions meet or exceed your personal minimums?
- If terrain rises above your planned altitude anywhere along the route, did you adjust your altitude to stay at least 2,000 feet above the highest point?
Answer no to any of these, and your planning isn’t done. Fix it first — then go fly.
The DPE will probe your cross-country planning during the oral exam. They’ll ask why you chose that altitude, what your fuel reserve actually is with forecast winds factored in, whether you checked airspace, and what conditions would trigger a divert. These aren’t trick questions. They’re checks on whether you actually thought through the flight or just filled in a form and hoped for the best.
That’s what makes thorough planning endearing to us pilots — it’s not glamorous work, but it’s the work that keeps the flight from becoming a story you’d rather not tell. The student who reads through this entire article is already ahead of most applicants. You’re not just learning the process. You’re learning exactly where students actually fail. That awareness alone changes what you do at the planning table.


Stay in the loop
Get the latest skyhighflighttraining updates delivered to your inbox.